Posts Tagged ‘For Kids’

Halloween Lollipops

Spider and Ghost Pops

This is a fun and easy project that is fun for kids and adults.

Spider PopsIMG_2927

MATERIALS:

Lollipops (I used chocolate tootsie pops)

Black pipe cleaners

Googlie eyes or red pom poms

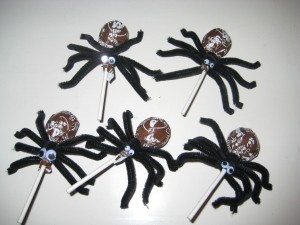
For each spider twist 4 pipe cleaners around the stem of the lollipop and twist them securely.  Depending on the length of your pipe cleaners you may want to cut each one in half so the spider legs are not too long.  Bend the legs similar to the picture shown.  Glue on googlie eyes or pom poms to the flat portion of the pipe cleaners.

Ghost Pops

MATERIALS:IMG_2846

Lollipops

Tissue paper or Kleenex

White pipe cleaner or white string

Googlie eyes

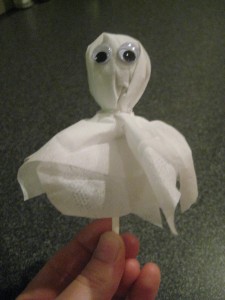
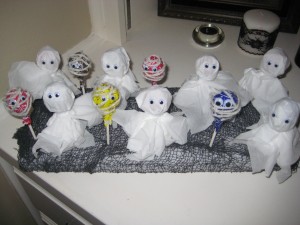
To start cut the tissue paper into a 10 inch square (if using a Kleenex there is no need to change the size.  Drape the tissue over the top of the lollipop.  Cut 1 inch pieces of the pipe cleaner or string.  Gather the tissue at the base of the lollipop stem and secure with pipe cleaner.  Glue two googlie eyes on the tissue for eyes.  I used a piece of foam covered in spider web to display the finished ghost pops.

IMG_2928

Spider Nest

Spider Nest

MATERIALS:

Plaster fabric strips (Rigid Wrap)

Large balloons (at least 11 inches)

Fishing line

Plastic spiders

Hot glue

Pin/needle

2 bowls

DIRECTIONS:

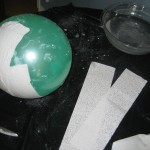
IMG_2848Inflate balloon and set it in a bowl to avoid it rolling away from you.  Fill a bowl of water to be used with the plaster strips.  Read and follow the directions that come with the plaster strips.  It is easier to use if the material is cut into pieces 8-10 inches long.  With the knotted end of the balloon pointed up toward the ceiling start covering the balloon from the top working your way down and around layering each piece over each other.  Don’t worry about smoothing out all the bumps as this will add texture to the finished project.  Continue layering the plaster cloth around the balloon.  Let dry according to the directions.

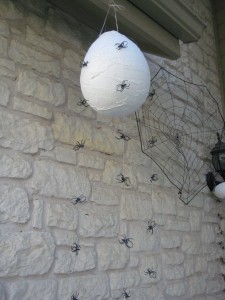
Once the plaster has dried, use a pin or needle to pop the balloon.  Cut several pieces of fishing lines in various lengths.  Tie the spiders onto the fishing line every 6 inches.  Use a pin to make a hole at the top of the plaster mold and tie the fishing line securely allowing the spiders to hang down.  To finish the project add a few spiders to the outside of the plaster form using hot glue so it looks like they are hatching and leaving the spider nest.  Use fishing line or thin twine to hang the completed spiders nest.

IMG_2903This project was found at http://familyfun.go.com/halloween.  For a more kid friendly version of this craft visit, http://www.ehow.com/how_4500321_make-spider-nest-halloween-decoration.html.  Styrofoam balls and cotton are a simple and clean version of this creepy craft.

Disneyland Birthday Celebration

3150450425_395d2eab08

Here is a great way to celebrate a birthday: go to the happiest place on earth (Disneyland). There are so many ways to take your party to the princess’ palace and have a blast at any age.

Invitation:

I suggest using Evite as you can include so many more details that on paper.

Body of the invite:

We can hardly believe it’s true.

Our little girl is turning two!

Grab your mouse ears and save the date

We’re going to Disneyland to celebrate

Other messages:

“Oh, Toodles…Look who is turning (age). Join us for a fun celebration at Mickey’s Clubhouse.”

Join us for a Goofy good time with Mickey and all his clubhouse friends as we celebrate (Name’s) birthday!

Have fun with the main message. Brainstorm words that go with the person’s name and age along with characters from Disneyland.

You can also customize the guest responses in your Evite to the ones below:

Who’s coming?—>See ya soon!

Attending——->Oh boy!

Undecided——>Gosh!

Declined——–>Aw, gee.

If you want to mail or hand out invitations here are a few resources:

Downloadable templates

Customizable Invitations

Entertainment:

For younger kids it is important to plan in rest time and meals into your day. You might consider getting a hotel room near the park so you have a warm/cool place to take a nap and get bundled up for the evening. You might want to create a schedule so all the guests would know where the birthday girl would be throughout the day. This will encouraged guests to get the most out of the park, but also balanced with celebrating with a young child.

Sample Schedule:

Fantasyland – 9am to noon

Lunch at Tomorrowland Terrace –noon to 1pm

Toon Town – 1pm to 3pm

Tomorrowland – 3pm to 4pm

The Plaza Inn Birthday Party (details below) – 2pm to 3pm

Adventureland – 3pm to 5pm

Disneyland Railroad – 5pm to 6pm

Dinner and rest off site – 6pm to 8pm

Fantasmic – 9pm to 10pm

Make sure to look at the parade and show schedule for the specific date you will be at the park. Watching a show will allow your feet to rest and get away from all the crowds.

My Disneyland Birthday Party:

For reservations, information and pricing, please call (714) 781-DINE. Hosted by Pat E. Cake, a fun-filled celebration featuring music, merriment, laughter and cake decorating — with a special appearance by Mickey and Minnie Mouse. All Guests receive a party hat, souvenir sipper cup, mini birthday cake, icing and cake toppings., The Plaza Inn Birthday Party takes place Monday thru Friday at 2pm, and lasts anywhere from 45 minutes to 1 hour. $15.99 per person.

Additional Resources for your Disneyland trip:

*Personal-Size Party Cake and Princess Jewelry Box ($15), can be ordered at any full service restaurant

*At City Hall ask for a Birthday Sticker. The birthday sticker entitles you to special treatment from the Disneyland Cast Members, who will always happily tell you Happy Birthday.

*Rider Swap: Take advantage of the Rider Swap policy, which lets adult Guests take turns waiting with youngsters too small or may not want to ride a certain attraction and then “swap” with another adult Guest from their party so both can experience the ride without standing in line twice.

*IPhone users can download apps to get attraction wait times, a park map and so much more. Visit ITunes and search Disneyland.

Mouse ears:

For a fun keepsake you can get mouse ears for guests to wear at the park or take home so the fun continues. Here are 2 ideas depending on the price range.

Mickey Cubhouse Ears

Personalized Mouse Ears, just like you get at the park

Dress Up:

I always love it when I see little girls at Disneyland wearing the princess dresses. If you decide to do this make sure your little one is comfortable and warm. Here are a few available from the Disney Store.

http://www.disneystore.com/kids-apparel-accessories/costumes/girls/c/57493/.
Krispie Kisses

Here is a great idea for kids to make for their friends, teachers, and loved ones for Valentine’s day.

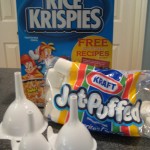
Materials:IMG_4320

3 tbls butter or margarine

1 package (10 oz., about 40) marshmallows

6 cups Rice Krispies

Funnel

Aluminum Foil

Paper

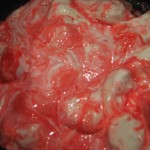
In large saucepan melt butter over low heat.  Add marshmallows and stir until completely melted.  Stir in food coloring and flavoring if desired.  Remove from heat.  Add Rice Krispies. Stir until well coated.  Let cool for 2 minutes.

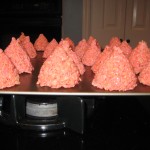
Spray funnel with Pam.  Spoon mixture into funnel and compact down to form the kiss shape.  Turn funnel upside down releasing the mixture on a cookie sheet.  Let cool for 30 minutes.

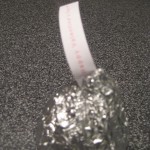
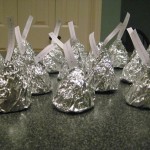
Using foil squares, wrap each kiss.  I found that pulling the foil in a diagonal motion looked more realistic compared to a chocolate kiss.  Print out a special message and cut into strips.  Add your special message before sealing the top of the kiss.

Take it to the next level:

-Add food coloring to the melted marshmallows for colored kisses (I used 8 drops of red to get this shade of pink)

-Use Cocoa Krispies for a chocolate flavored treat

-Add flavoring to the melted marshmallows (I used peppermint)

Krispie Kisses Message

For another idea using Rice Krispies Treats check out http://www.ricekrispies.com/#/recipes/valentine-cut-out-treats