Flower Headbands
Posted in Beginners, Fashion, Gifts on 07/24/2010 07:15 pm by ChrissyFlower Headbands
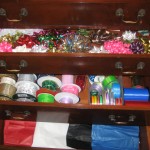
Materials
Artificial Flowers
Headbands
Acrylic Jewels
Felt
Hot glue gun and glue
There are a large variety of headbands available so make sure you try a few out and find a style that is comfortable for your head. Children’s headbands are also available. I used both plastic and cloth varieties to show you more than one way to utilize the headband that works best for you.
The Basic Headband
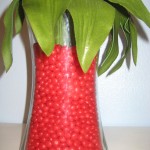
 Remove all the flowers from the stems. Keep the leaves as you might want to add them to your headband for more color and volume. Disassemble the flower pieces removing the hard plastic backing and center piece. Lay them out in the order you take them off the stem.
Using hot glue secure the layers of the flower to each other starting with the largest petal and working to the smallest. Glue a jewel to the center of the flower.
Next it is time to glue the flower onto the headband. Using a mirror determine where you want your flower to sit on your head. You can put it wherever you think it looks cute. You may even want it in the center depending on your hair cut. If you are using a cloth headband the placement is not as important as you can adjust the flower once it is one your head.
Put a large drop of glue on the back of the flower and press it onto the headband. Hold it for a few seconds so the glue can cool. DON’T BURN YOURSELF. Cut a strip of felt to cover the back of the flower. Place hot glue on the back of the flower which will also cover part of the headband. Secure the felt to the glue forming a soft flat surface that will sit against your head.
Style your hair, put the headband on, but most importantly have fun and look cute.
Variations:
-For the center of the flower you can use sea beads or buttons
-Spray the flowers with spray paint. Gold or silver metallic looks pretty and adds more drama.
-Add tulle behind the flower
-Wrap ribbon around the headband. This trick is handy if you can’t find a specific color headband.
-Using a variety of sizes of flowers add multiple flowers along the side of the headband for a more dramatic effect
-Use snap barrettes instead of a headband
-Use a needle and thread if you don’t want to use hot glue, especially for cloth headbands for babies.